Hey there my fellow fishing enthusiasts. Today we are going to open the toolbox and check out my 7 DIY fishing kayak modifications to stick on this year. The motivation for this post has again arisen from my real life experiences where I have been trying to attach my GoPro to my kayak so that I can shoot videos for this site.
I did have it screwed into the rod holder flush mount in the middle of my kayak however I found it just didn’t provide enough ‘space’ to cover everything I wanted to film such as rod setup and actually landing a fish etc. After some research, I found an option to install a mount or gear track to the side. This would allow me to move the camera up and down, as well as attach other stuff as well.
So with that all in mind, let’s have a look at some of the after-market options we can add to our kayaks to either convert them into a fishing model or just to make things that little bit easier…
Note: Some of these options will require installation with tools such as drills and screwdrivers etc with some waterproofing as well. If you are not handy with these things, I would recommend hiring a professional to assist here.
1. Mount Tracks
Let’s start with my need for mount tracks (some call them track mounts). These are generally made of aluminium and are screwed to the top side of the vessel. The advantages of these is that once they are installed, you can purchase any number of tools that attach by sliding down the track and screwing into place (via the top and bottom plate on the tool).

As mentioned, these are a great addition as you can use them to add many other tools such as:
- Rod holders
- Camera holders
- Tie down rings
- Paddle clips
- Bait boards
- Trolling motor mounts
- And so on
Track mounts are generally screwed onto the top of the kayak – waterproofing will be required around screws to stop leaking into the base of the vessel.
2. Rod holder
In my opinion you can never have too many rod holders on a kayak – especially if you are also carrying a net or safety flag/light as well. So this option is a good one for those who are either converting a recreational kayak into a fishing model, or have a need for some more holders on the option they have.

The simplest installation choices here are ones that run along the mount tracks installed at option 1 above, or screwed onto the flush mount on the centre of the vessel. However, if you are looking to install them onto the vessel hull themselves, you will need to cut a hole within the kayak to slot them into – again, with all relevant water proofing included.
3. Clip rings
This next modification is a great one for those who like to attach other ‘things’ to their kayak such as lights, anchor trolleys, keeper bags, carry handles and so on. The main two options for this type of attachment are:
- Full ring – these slide onto the mount track and good for tying vessel to an anchor point etc.
- Eyelets – half circle rings that are generally screwed onto the side of the vessel for bungee tie down attachment as well as most of the use options listed above.
As above, the slide on clip rings slide onto to the mount track for easy installation. Eyelet rings however are screwed into the top or side of the vessel – just don’t forget the waterproofing.
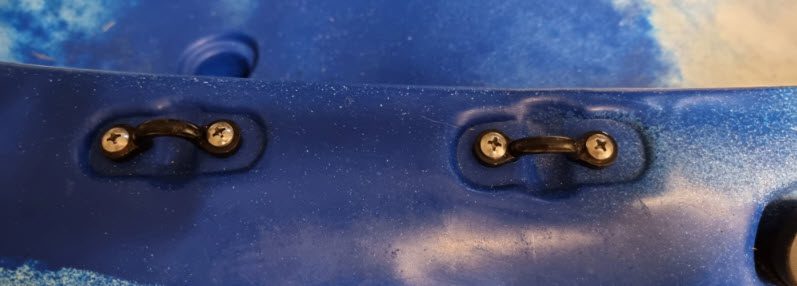
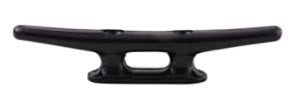
4. Cleats
Should you be predominantly using your kayak in a lake or other waterway where it can be ‘parked’ beside a jetty or pontoon, or like to use an anchor whilst fishing, then a cleat may be something that you can add. Circle clips as above can certainly be utilised for this however for added strength and stability, a cleat is better suited.
Basic models start as a simple plastic rope grip up to spring-loaded clam cleats that allow for moorings to be tightened and released as required. There are also the kayak sized double pronged cleats as used on docks and piers to moor ships etc. In most cases, cleats are screwed into the side or end of the kayak – again with all relevant waterproofing incorporated into the installation.
5. Paddle clips
I remember the day well, a nice big fish decided my lure was worth the effort and I was on!! Next thing I knew, my paddle was floating down the waterway past me… You see many kayaks come with an elastic strap on the side that is good for holding the paddle on whilst in transit, but not as easy to attach the paddle to on the water – especially when in a hurry…

So there are a couple of options here that can assist you in not only keeping your paddle on the boat, but also being able to store it quickly when the need arises. These are:
- Clip on holder – these are moulded plastic ‘racks’ that the paddle clips into. They are generally screwed into the side of the vessel so that the paddle sits flush when attached.
- Roller grip holder – paddles are held in place via two rollers at the top of a v shaped bracket. The paddle simply clips in and out as needed. These types slide into the track mount meaning they can be adjusted to best suit the paddler.
6. Anchor lock
In most cases, kayak anchors are simply attached to the kayak via a rope through the ring clips or anchor cleats discussed above. However, if you are fishing in an environment where you have the need to constantly increase or decrease line length or the current is strong, then an anchor lock may be a useful addition.
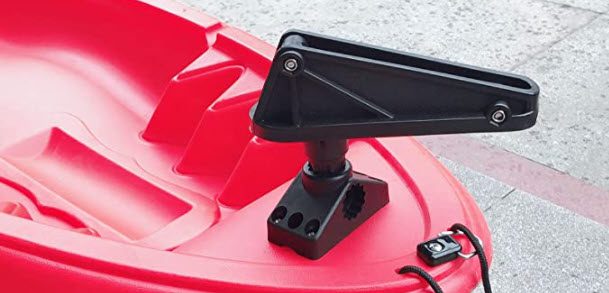
Anchor locks allow for better management when a kayak is being anchored via:
- 360 degree line rotation
- Ability to release or lock rope as required
- Ability to adjust where the anchor sits on the vessel
Anchor locks can be attached to the kayak via the flush mount on the centre of the vessel or the track mount at the side. They can also be screwed directly to the side if needed.
7. Dry hatch
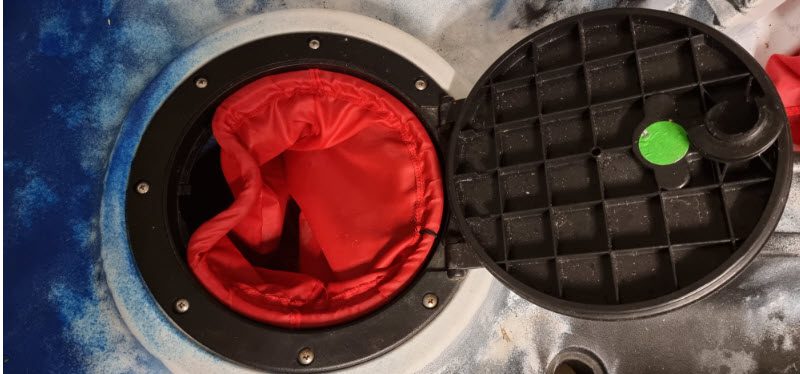
Most kayaks come with these installed however if you are converting a recreational kayak to a fishing one, or simply need another storage area, then another good modification option is the addition of a dry hatch. These allow you to store items such as spare tackle, wallets, phones and so on away from the water.
The installation of these however is probably the most tricky of this list as they have to be installed into the top of the hull meaning a good drill and jigsaw will probably be required.
Conclusion
And there they are – my 7 DIY fishing kayak modifications to stick on this year. I hope it has been helpful and as usual, please let me know of your experiences or any other tips you may have.
Also, please do not hesitate to comment below if you have any questions, concerns, corrections or would like me to check anything else out for you.
Until next time
Have fun
Paul


Thanks mate
Glad it was helpful
Paul
Howdy! Would you mind if I share your blog with my myspace group?
There’s a lot of people that I think would really appreciate your content.
Please let me know. Many thanks
Didn’t know myspace was still around?? haha = but sure
Paul
Thanks – Appreciated
Paul
Thanks Herbert
Appreciated
Paul
Hey There
No, I don’t really clear my head as such rather just try and write like I speak. I find that doesn’t make me need to think about it too much. Oh, and never write when I am tired.
Hope this helps
Paul
Glad it was helpful
Paul
Hey! I realize this is somewhat off-topic but I needed
to ask. Does operating a well-established blog like yours require a massive amount
work? I am completely new to running a blog however I
do write in my journal on a daily basis. I’d
like to start a blog so I can easily share my experience and thoughts
online. Please let me know if you have any recommendations
or tips for new aspiring bloggers. Appreciate it!
Hey there, yeah, I spend around 10 – 15 hours a week on it. but it depends on what you are trying to achieve.
Thanks Joan
Working on it
Paul